
Creating a ChartMogul account
ChartMogul accounts can be set up as a new 14-day free trial, created directly from an existing ChartMogul account, or joined via an invitation from an admin at your organization.
You can sign up using Google SSO or an email address and password. If your company already uses ChartMogul, don't start a new trial—ask an admin to invite you instead.
Here’s what we cover in this article:
Resources and further reading:
Before you begin
- Decide how you want to log into ChartMogul: using single sign-on (SSO) with your Google account or email and password.
- When signing up with Google, you don’t set up a password, but you can assign a password later.
- By creating a ChartMogul account you agree to the ChartMogul Terms of Service and Privacy Policy.
Setting up a ChartMogul account
If you work for a company that uses ChartMogul, don’t follow the steps in this section. Instead, follow the steps to join an existing account.
If you already have a ChartMogul account and want to use the same email address, you can create a new one directly from ChartMogul.
To create a new ChartMogul account:
-
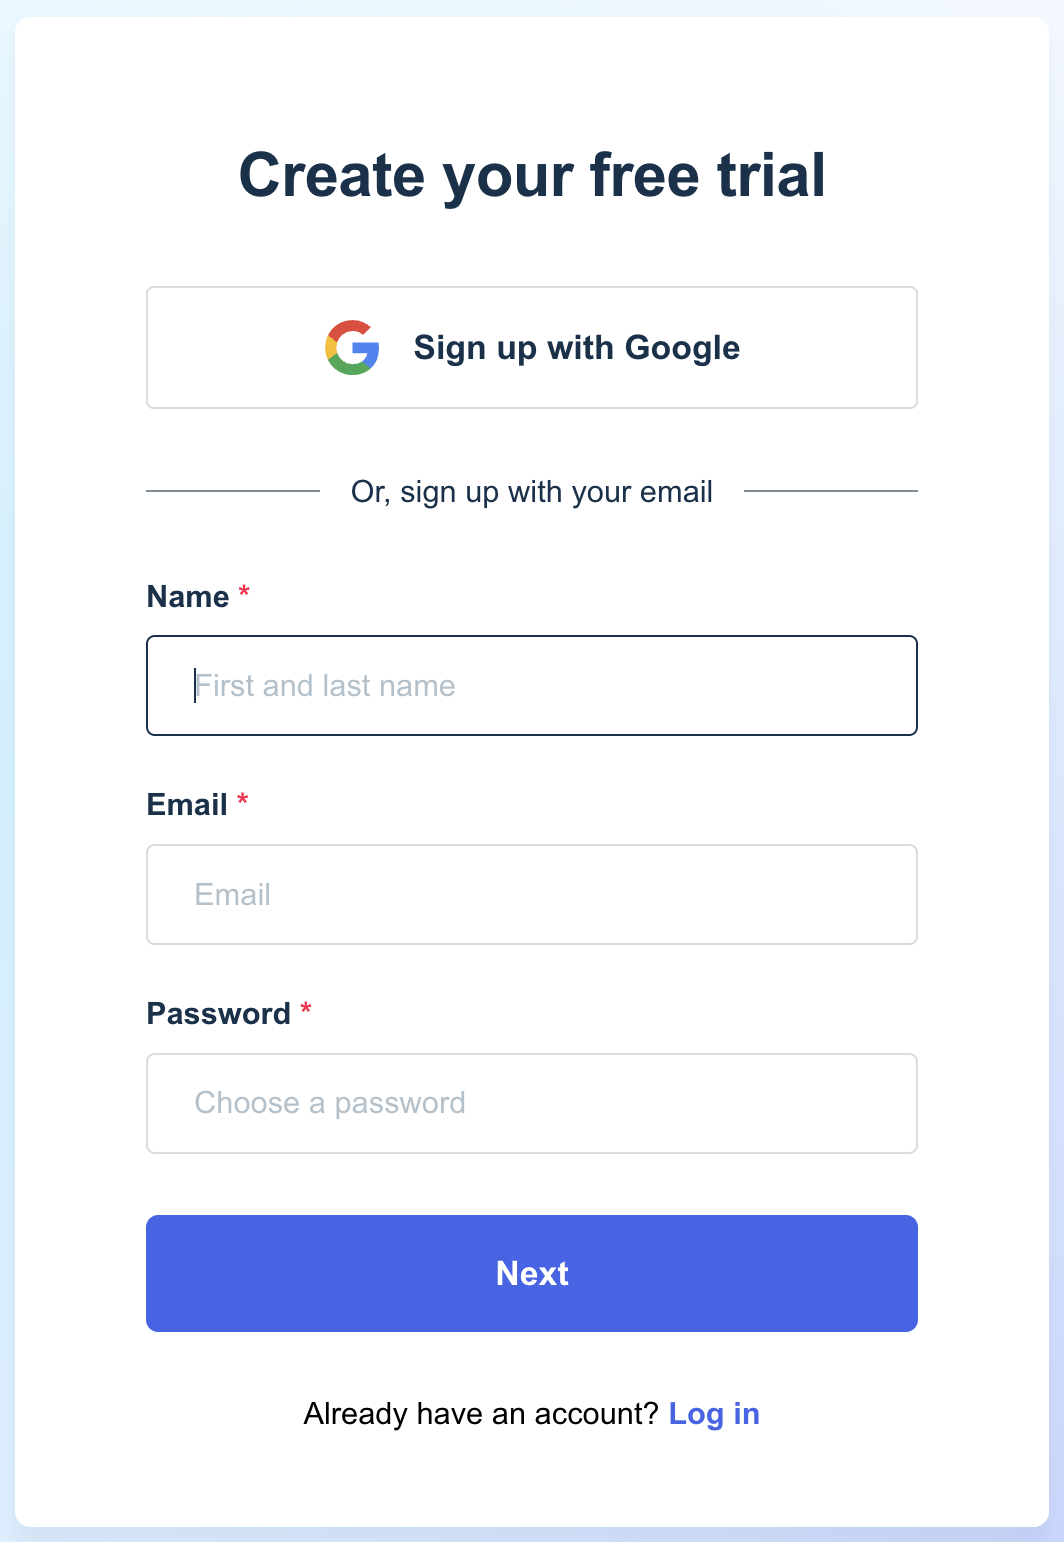
Visit our signup page.
- You have two signup options:
- To create an account with Google, click Sign up with Google and log into your Google account.
- To create an account with your email address, enter your Name, Email, a Password and click Next.
- Enter your Company name, the company’s Revenue band as well as your business’ Primary currency and work Phone number.

- Click Create My Trial.
Your 14-day trial will start and you’ll be redirected to the ChartMogul dashboard.
Joining your company’s ChartMogul account
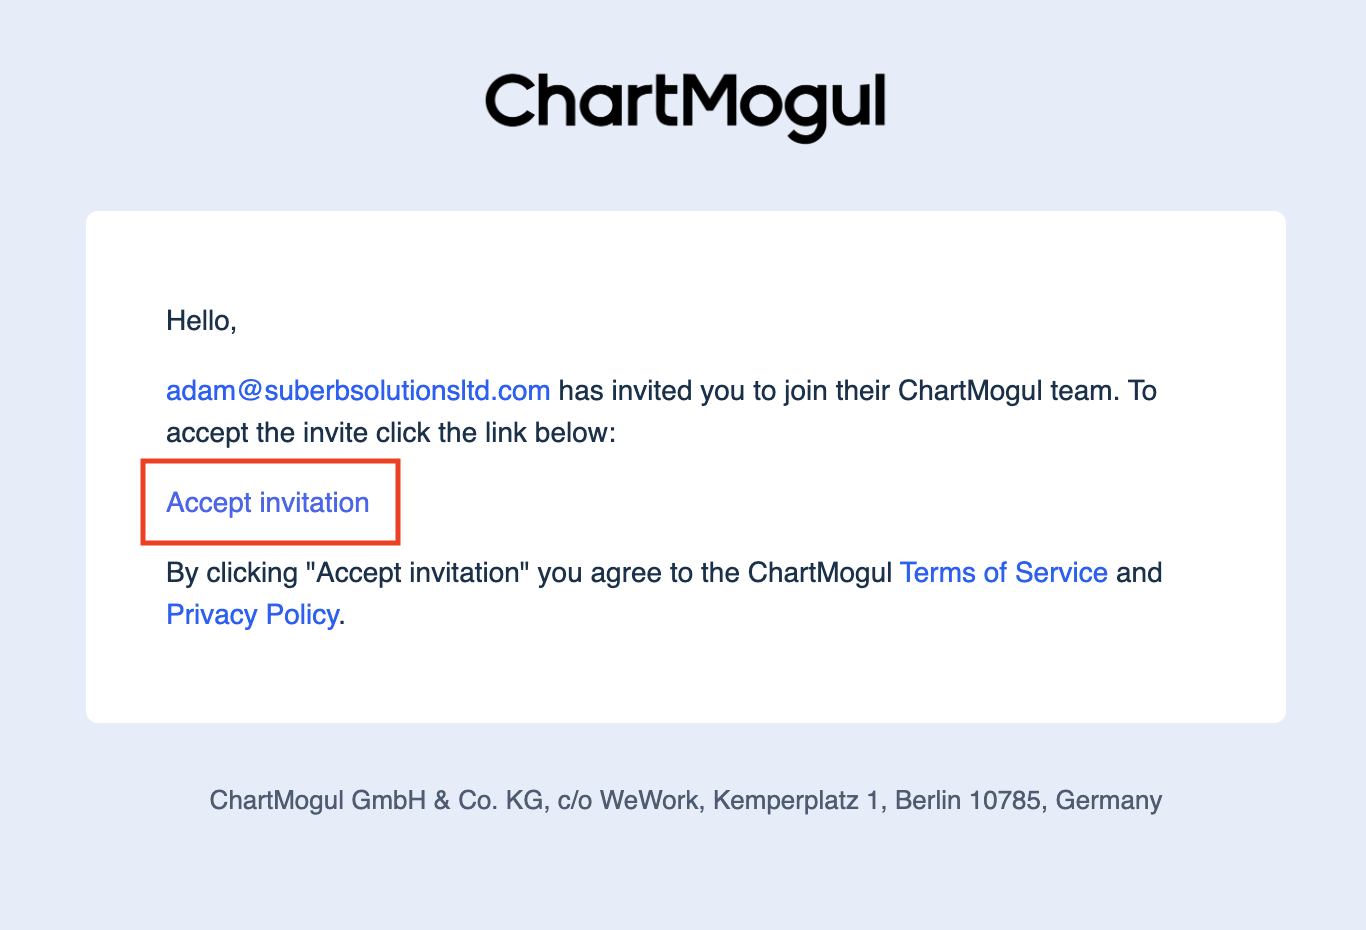
To join an existing account, you’ll need an invitation from an admin at your organization. Don’t start a new trial.
To set up an account:
-
Click Accept invitation in the email inviting you to join ChartMogul.
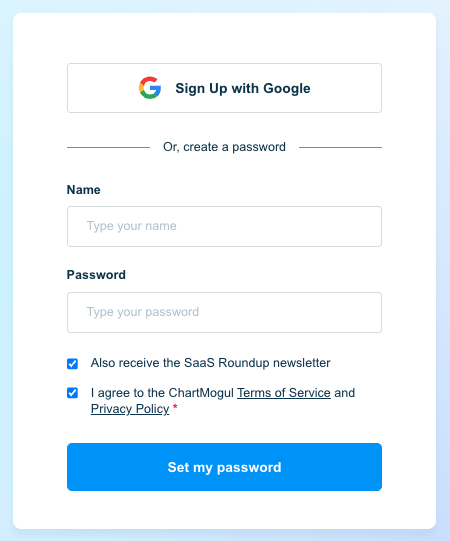
- You have two signup options:
- To set up an account with Google SSO, click Sign up with Google and log into your Google account.
-
To set up an account with your email address, enter your name and password and click Set my password.

ChartMogul will create your account and prompt you to set up two-factor authentication or redirect you to the ChartMogul dashboard.
If you already have a ChartMogul account associated with the same email address, the account you’re joining will automatically appear as a workspace in your Profile menu.
Next steps
For admins setting up a ChartMogul account:
- Learn how to configure data settings and import data for Subscription Analytics or CRM.
- Add an extra layer of security to your account and set up two-factor authentication.