
Configuring Amazon S3 as a destination
You’ll need to be an Admin or Staff in ChartMogul and Amazon AWS to complete the steps outlined in this article. Read more about roles and permissions.
Configure Amazon’s Simple Storage Service (S3) as one of ChartMogul’s advanced destinations to export MRR movement, customers, custom attributes and tags. From there, you can send your data to a data warehouse and combine it with other datasets for further analysis.
Here’s what we cover in this article:
Resources and further reading:
- Creating, configuring and working with Amazon S3 buckets
- Understanding MRR movements
- Custom attributes
- Tags
- Developer guide on destinations
Before you begin
Decide which format you'd like ChartMogul to send data, either as a gzip compressed CSV (according to RFC4180) or using the parquet data storage format (with Snappy compression).
Step 1 — Create an S3 bucket for ChartMogul
First, create a new Amazon S3 bucket:
-
Within S3, navigate to Buckets > Create bucket.
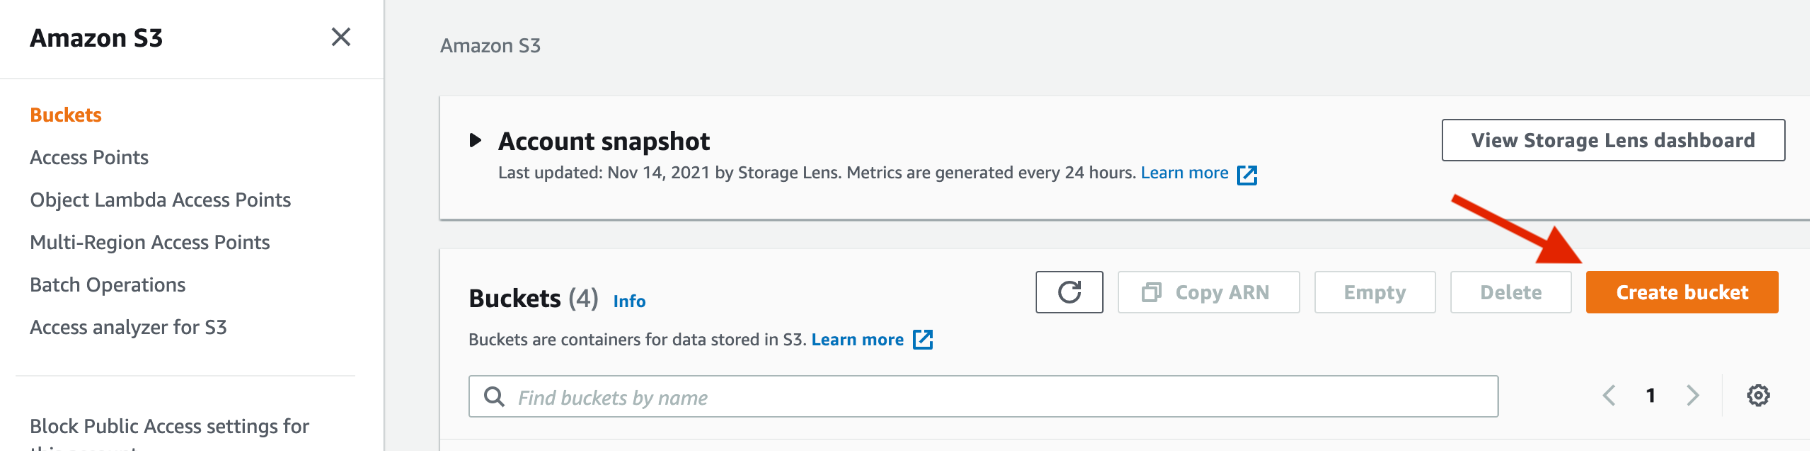
- Name your S3 bucket according to Amazon’s bucket naming rules and enter the name in the Bucket name field.
- Select an AWS Region from the AWS Region drop-down.
- Complete any additional setup option you may need, then click Create bucket.
Step 2 — Create an IAM policy
Next, create an AWS Identity and Access Management (IAM) policy that allows ChartMogul to access the S3 bucket you just created.
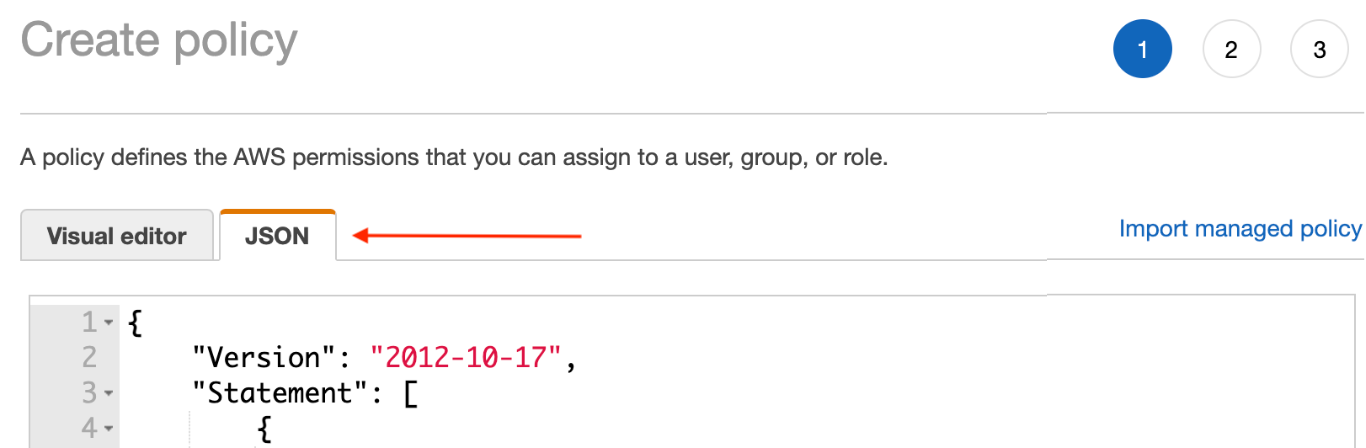
- Within IAM, navigate to Policies > Create policy.
- Click the JSON tab and add the following code, replacing <BUCKET_NAME> with the name you used to create the bucket in the previous step. Then click Next: Tags.
{
  "Version": "2012-10-17",
  "Statement": [
    {
      "Effect": "Allow",
      "Action": [
        "s3:GetObject",
        "s3:PutObject",
        "s3:PutObjectAcl",
        "s3:ListBucket",
        "s3:DeleteObjectVersion",
        "s3:DeleteObject",
        "s3:GetObjectVersion"
      ],
      "Resource": [
        "arn:aws:s3:::<BUCKET_NAME>/*",
        "arn:aws:s3:::<BUCKET_NAME>"
      ]
    }
  ]
}
- Finally, give your policy a name, e.g., ChartMogul, and click Create policy.
Step 3 — Create an AWS IAM user
Now, create an AWS Identity and Access Management (IAM) user that will have permission to access the S3 bucket. After creating the user, they’ll have an Access key ID and a Secret access key, which you’ll use to create the destination in ChartMogul.
-
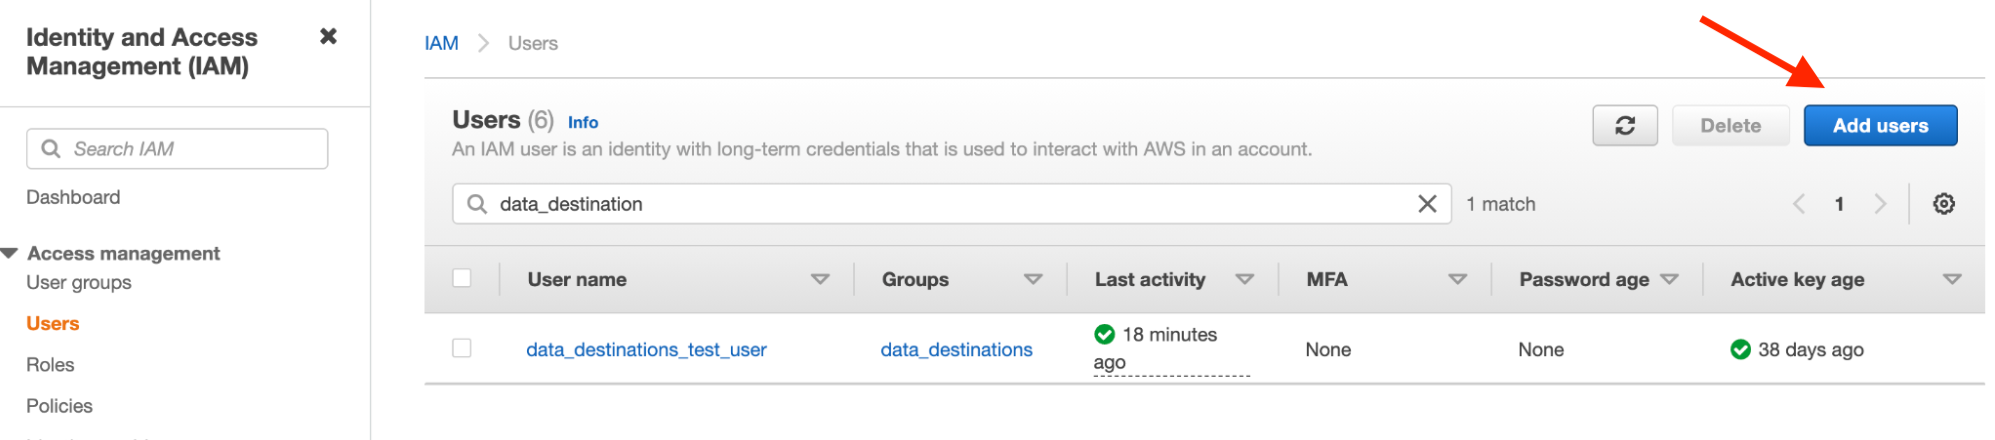
Within IAM, go to Access management > Users > Add users
-
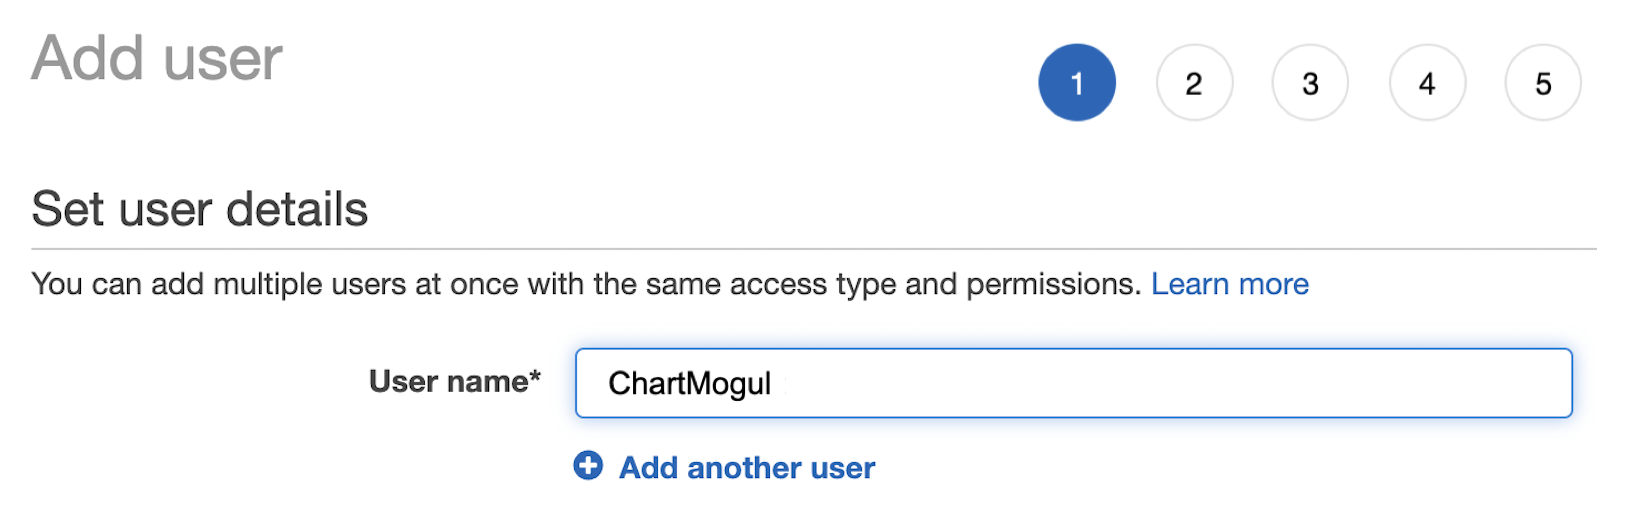
Enter a name for the user, e.g., ChartMogul, in the User name field.
-
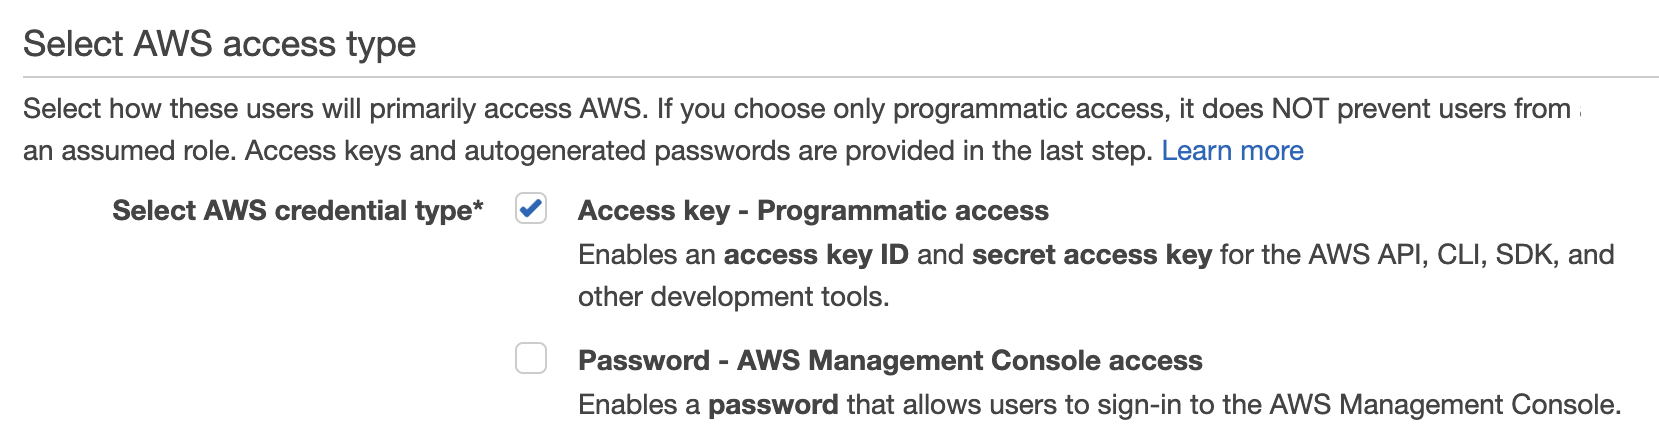
Select Access key - Programmatic access as the AWS credential type.
-
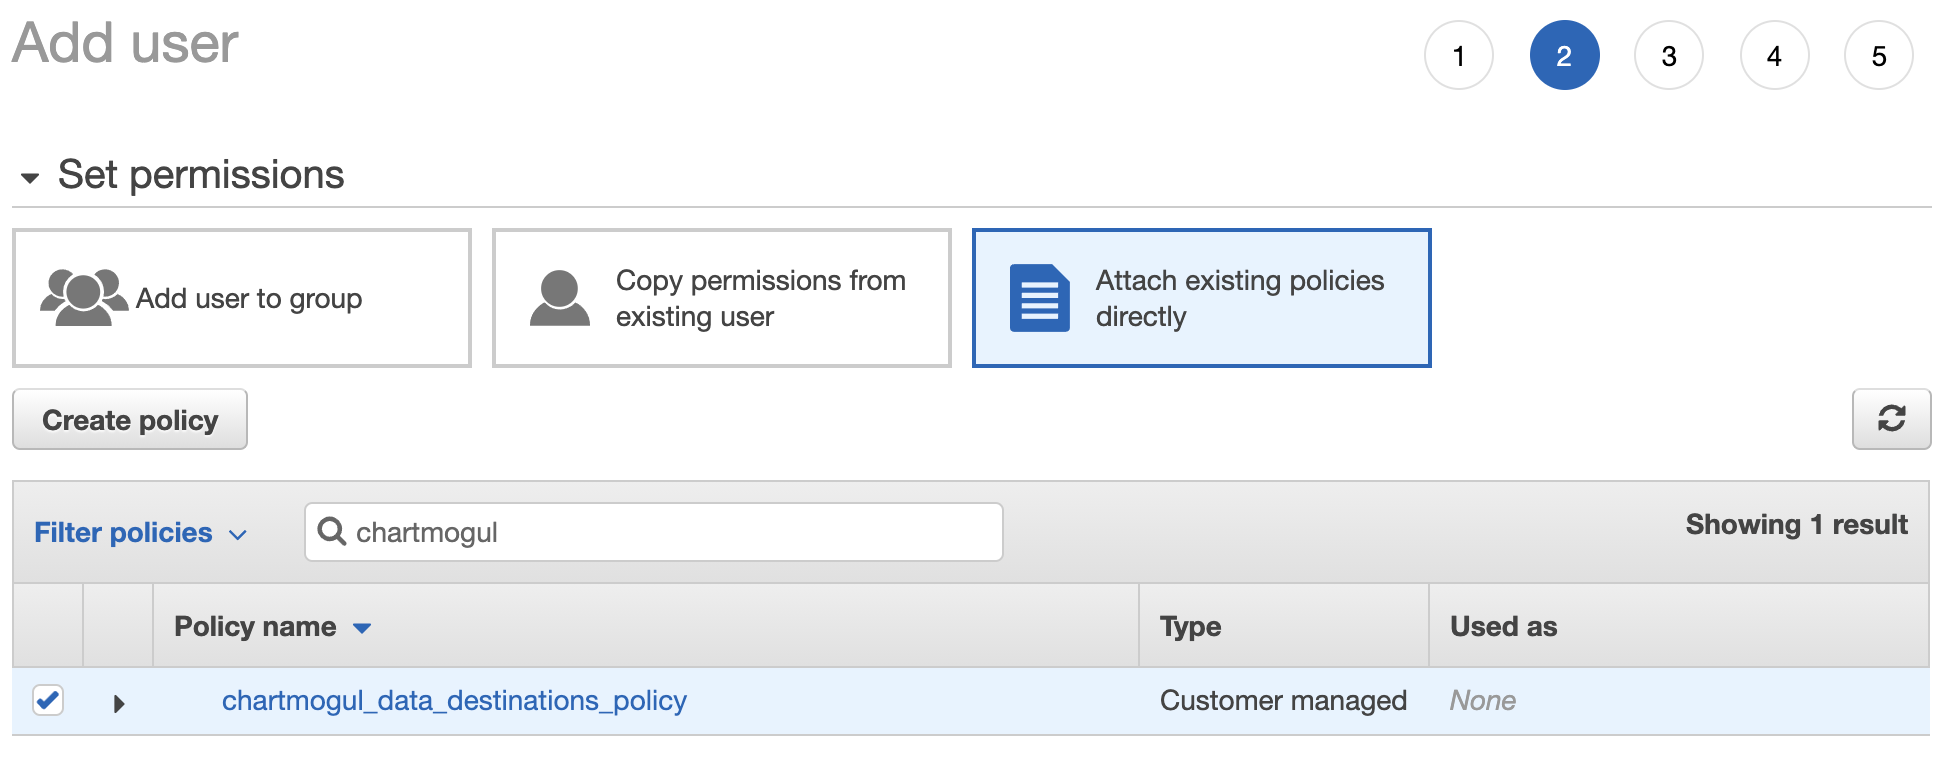
Under Set permissions, click Attach existing policies directly, then search for the IAM policy you created in the previous step using its name and tick the box to select it. Finally, click Next.
- Add any tags you’d like to the user, then click Next: Review.
-
If everything looks good, click Create user.
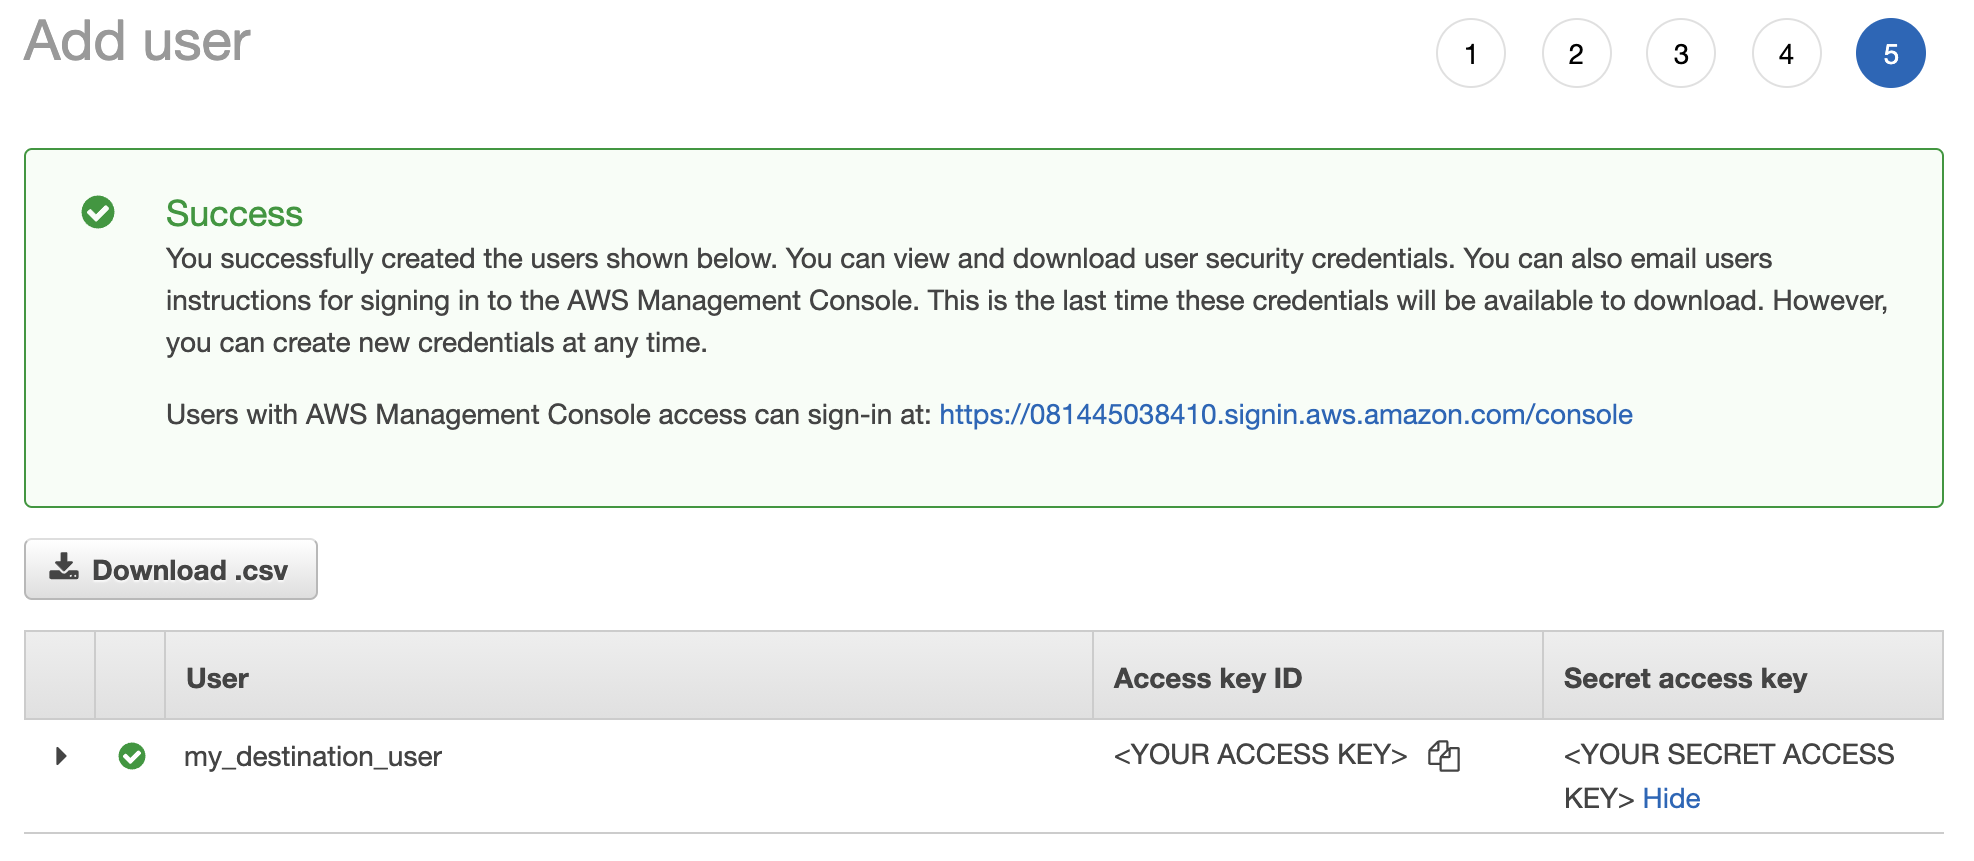
Be sure to note the Access key ID and Secret access key. You’ll need these in the final step, and this is your only opportunity to write them down.
Step 4 — Add Amazon S3 as a destination
Finally, add your Amazon S3 bucket as a destination in ChartMogul.
- Within ChartMogul, navigate to Settings & Data > Destinations.
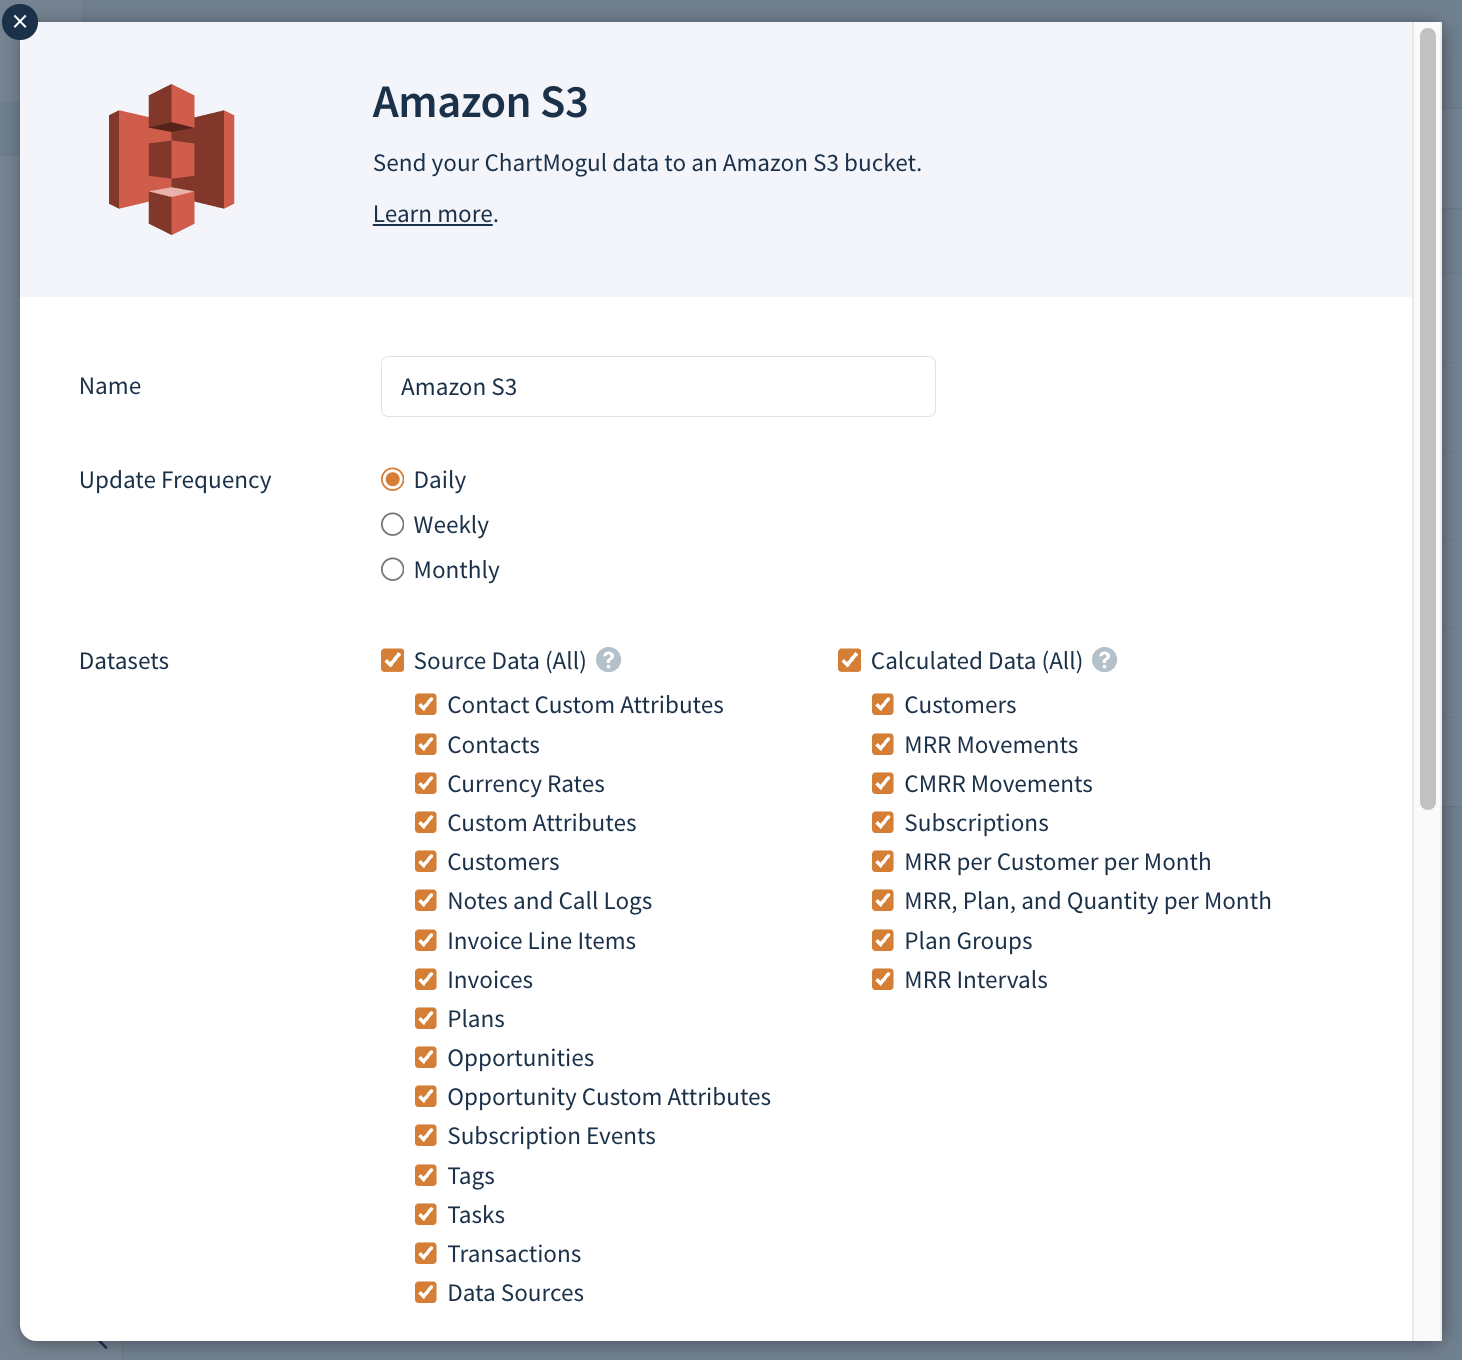
- Click ADD DESTINATION and select Amazon S3.
- Enter a unique name for your destination in the Name field.
- Under Update Frequency, choose how often you’d like ChartMogul to export data to your S3 bucket:
- Daily (9:00 UTC each day)
- Weekly (9:00 UTC each Sunday) or
- Monthly (9:00 UTC on the first day of each month)
- Choose the datasets you'd like to export:
- Choose the file type you'd like to export, either:
- Parquet or
- CSV
- Enter the name of your bucket as it appears on your AWS account in the Bucket Name field.
- Choose the region you selected when creating your bucket from the AWS Region drop-down.
- Enter the Access Key ID and Secret Acess Key for the IAM user you created.
- Click SAVE to create the destination. Click SEND DATA to start the first export.
ChartMogul will be sending the datasets you’ve selected to Amazon S3 based on your Update Frequency setting.
Click SEND DATA NOW to trigger an export outside of your scheduled intervals. Learn more
.