
Configuring Google Cloud Storage as a destination
You’ll need to be a Staff or Admin in ChartMogul and an Admin in Google Cloud Platform to complete the steps outlined in this article. Read more about roles and permissions.
Configure Google Cloud Storage as one of ChartMogul’s advanced destinations to export MRR movements, customers, custom attributes and tags. From there, you can send your data to a data warehouse and combine it with other datasets for further analysis.
Here’s what we cover in this article:
- Creating a Google Cloud project
- Creating a service account
- Creating a Cloud Storage bucket
- Assigning permissions
- Adding Google Cloud Storage as a destination
Resources and further reading:
- Google Cloud Storage documentation
- Understanding MRR movements
- Custom attributes
- Tags
- Developer guide on destinations
Before you begin
Please review the following details before completing the steps we outline in this article.
- You'll need to decide which format you'd like ChartMogul to send data, either as a
gzipcompressed CSV (according to RFC4180) or using the parquet data storage format (with Snappy compression). - If you have already configured Google BigQuery as a destination, we recommend creating and configuring a new bucket for your Google Cloud Storage destination.
Step 1 — Create a Google Cloud project
If you don’t have a Google Cloud project for your Cloud Storage bucket, create one:
- Within Google Cloud Platform, navigate to IAM and Admin > Create a Project.
- Enter a Project name.
- Optionally, click Browse in the Location field to select your Google Workspace organization.
- Click Create.
Step 2 — Create a Cloud Storage service account
Then, create a service account that will have permission to access the bucket. After creating the service account, you’ll download the account’s private key as a JSON file, which you’ll need when creating the destination in ChartMogul.
- Within Google Cloud Platform, use the Select a project drop-down to choose the project for your Cloud Storage bucket (the one you created in the previous step or an existing project).
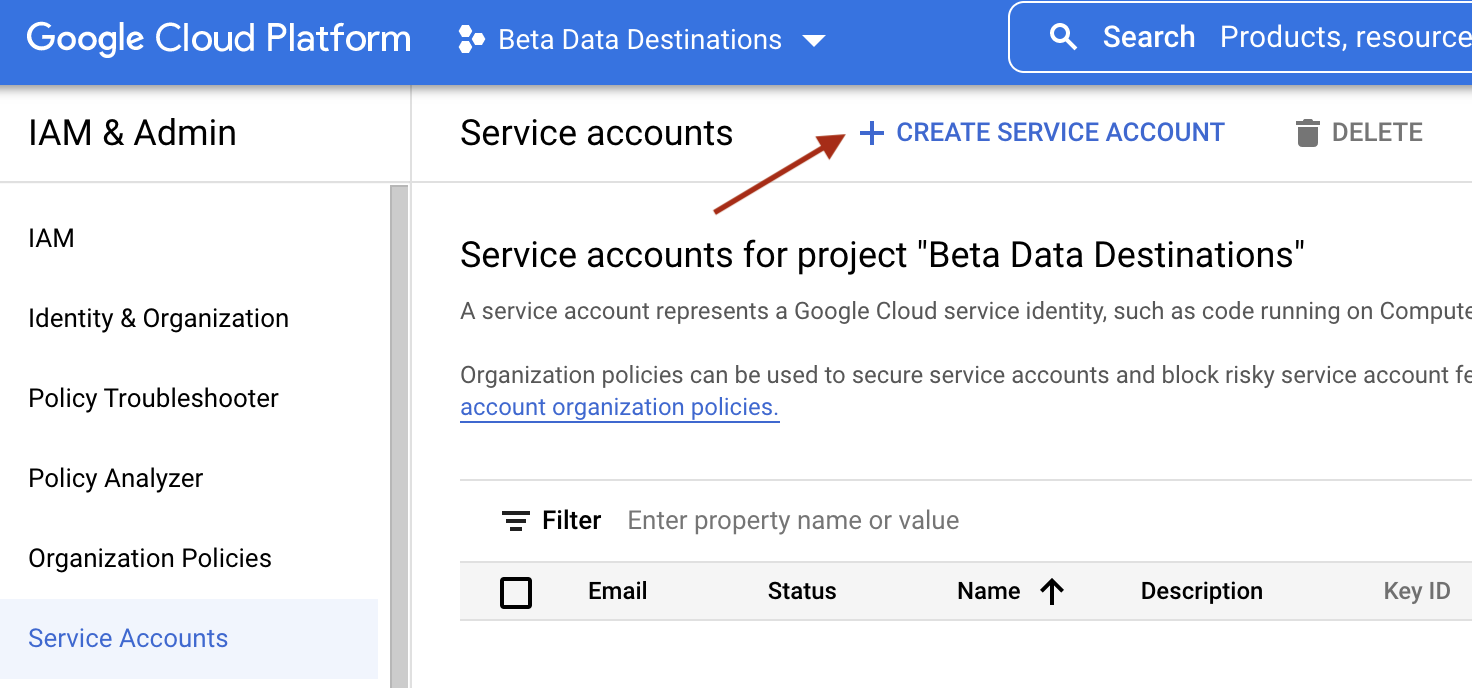
- Navigate to IAM and Admin > Service Accounts.
-
Click + CREATE SERVICE ACCOUNT.
- Enter a name for the service account, e.g., ChartMogul, in the Service account name field.
- Optionally, adjust the automatically generated Service account ID and describe what the service account will do in the Service account description field.
- Click CREATE AND CONTINUE.
- Skip the Grant this service account access to your project section and click DONE.
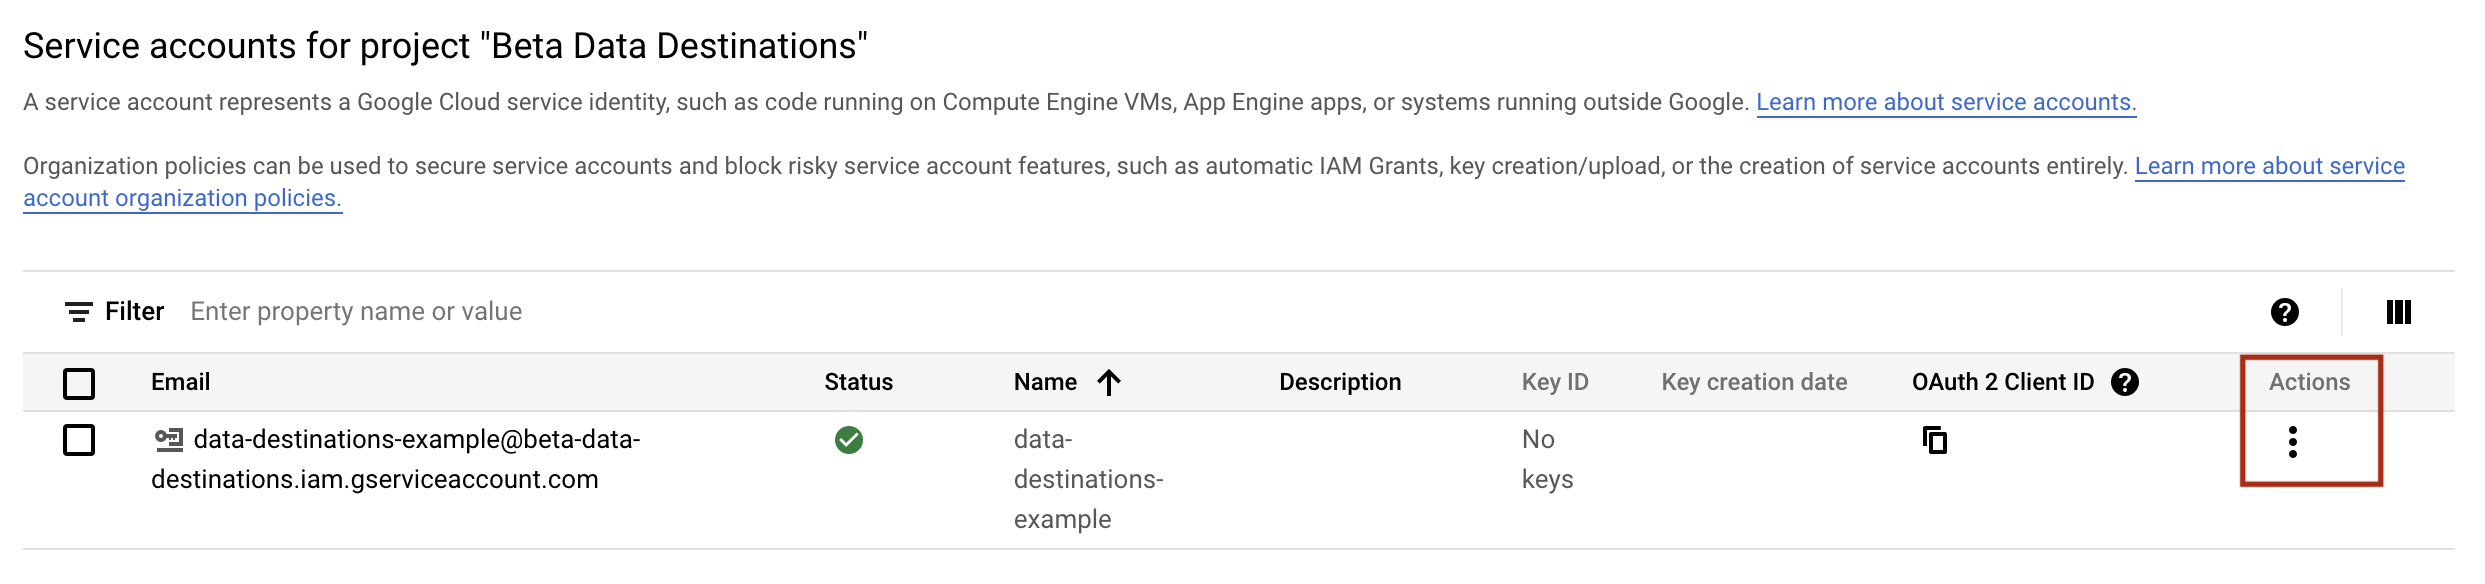
-
Once Google has created the account, find it in the Service accounts table, click the vertical ellipsis Actions icon and select Manage keys. Next, click ADD KEY > Create a new key.
- With JSON selected as the Key type, click Create. Your browser should then download the private key as a JSON file.
- Finally, navigate to DETAILS and note your email, as you'll need this when setting up permissions.
Step 3 — Create a Cloud Storage bucket for ChartMogul
Next, create a new Cloud Storage bucket:
- Within Google Cloud Platform, navigate to Cloud Storage and click + CREATE BUCKET.
- Name your bucket according to Google’s bucket naming guidelines. Click Continue.
- Within Choose where to store your data, select a Location Type (Multi-region, Dual-region or Region) and your bucket’s geographic location from the Location drop-down menu. Click Continue.
- Optionally, adjust the settings within Choose a storage class for your data to control your costs for storage, retrieval and operations. Click Continue.
- Within Choose how to control access to objects, restrict your data from being publicly accessible by checking Enforce public access prevention for this bucket. Click Continue.
- If needed, configure data protection tools within Choose how to protect your data.
- Click Create.
Step 4 — Assign permissions to the bucket
Now, grant the service account access to the Cloud Storage bucket:
-
Within Bucket details, navigate to PERMISSIONS.

- Click GRANT ACCESS.
- In the New principals field, enter the email address associated with the service account you created in the previous step. You’ll find the email in your service account’s DETAILS section.
- Select Storage Object Admin from the Role drop-down.
- Click SAVE.
Step 5 — Add Google Cloud Storage as a destination
Finally, add your Google Cloud Storage as a destination in ChartMogul:
- Within ChartMogul, navigate to Settings & Data > Destinations.
- Click ADD DESTINATION and select Google Cloud Storage.
- Enter a unique name for your destination in the Name field.
- Under Update Frequency, choose how often you’d like ChartMogul to export MRR movement data to your bucket:
- Daily (9:00 UTC each day)
- Weekly (9:00 UTC each Sunday) or
- Monthly (9:00 UTC on the first day of each month)
- Choose the datasets you'd like to export:
- Choose the file type you'd like to export, either:
- Parquet or
- CSV
- Enter the name of your bucket as it appears on your Google Cloud Storage account in the Bucket Name field.
- Upload the service account’s private key JSON file your browser downloaded in Step 2.
- Click SAVE to create the destination. Click SEND DATA to start the first export.

ChartMogul will be sending the datasets you’ve selected to Google Cloud Storage based on your Update Frequency setting.
Click SEND DATA NOW to trigger an export outside of your scheduled intervals. Learn more.