
Configuring Snowflake as a destination
You’ll need to be an Admin or Staff in ChartMogul and use the ACCOUNTADMIN role in Snowflake to complete the steps outlined in this article. Read more about roles and permissions.
Snowflake’s Data Cloud is powered by an advanced data platform provided as Software-as-a-Service (SaaS). Configure Snowflake as one of ChartMogul’s advanced destinations to export MRR movements, customers, custom attributes and tags to Snowflake tables. From there, you can create your own views and combine datasets for further analysis.
Here’s what we cover in this article:
- Creating a Snowflake database and warehouse
- Creating a Snowflake role and granting permissions
- Securing network access to Snowflake
- Creating a Snowflake user
- Creating a storage bucket
- Authenticating with key pair authentication
- Adding Snowflake as a destination
Resources and further reading:
- Getting started with Snowflake
- Key concepts and architecture
- Understanding MRR movements
- Custom attributes
- Tags
- Developer guide on destinations
Before you begin
Please review the following details before completing the steps outlined in this article.
- You’ll need to identify your Snowflake account identifier using an account locator in the format
account_locator.cloud_region_idor account name in the formatorganization-account_name. - You’ll need to decide which cloud option ChartMogul will use as a storage staging area to ingest your data: AWS S3 or Google Cloud Storage.
- Steps 1–5 require you to execute SQL commands (queries) using a worksheet in Snowflake.
- ChartMogul uses an S3 or GCS bucket (depending on your chosen provider, that you’ll set up) as a staging area to send data to Snowflake. ChartMogul first uploads data using the parquet data storage format to the bucket, then moves the data into Snowflake tables. ChartMogul refreshes (overwrites) the data in these tables as part of its daily sync.
- If you have already configured Amazon S3 or Google Cloud Storage as a destination, we recommend creating a new S3 bucket for your Snowflake destination.
Step 1 — Create a Snowflake database and warehouse
Create a new Snowflake database and warehouse for ChartMogul:
- Log in to Snowflake.
- Within Worksheets, click + Worksheet. Copy and paste the following commands into the SQL editor in the Snowflake UI:
CREATE DATABASE CHARTMOGUL_DATA;

CREATE WAREHOUSE CHARTMOGUL_WAREHOUSE
  WITH
    WAREHOUSE_SIZE    = 'XSMALL'
    WAREHOUSE_TYPE    = 'STANDARD'
    AUTO_SUSPEND      = 60
    INITIALLY_SUSPENDED = true;
- Select the commands and click the Run button.
Step 2 — Create a Snowflake role and grant permissions
Create a new role with the permissions required to load your data into the newly created warehouse:
- Copy and paste the following commands into the SQL editor in the Snowflake UI:
CREATE ROLE CHARTMOGUL;

GRANT USAGE ON WAREHOUSE CHARTMOGUL_WAREHOUSE TO ROLE CHARTMOGUL;
GRANT USAGE ON DATABASE CHARTMOGUL_DATA TO ROLE CHARTMOGUL;
GRANT CREATE SCHEMA ON DATABASE CHARTMOGUL_DATA TO ROLE CHARTMOGUL;
GRANT ALL ON ALL SCHEMAS IN DATABASE CHARTMOGUL_DATA TO ROLE CHARTMOGUL;
- Select the commands and click the Run button.
Step 3 — Secure network access to Snowflake
We recommend creating a network policy to limit access to your Snowflake instance to ChartMogul IP addresses:
- Copy and paste the following command into the SQL editor in the Snowflake UI:
CREATE NETWORK POLICY CHARTMOGUL_POLICY
  ALLOWED_IP_LIST = (
    '3.248.174.47/32',
    '99.80.87.208/32',
    '34.248.167.65/32'
  );
- Select the command and click the Run button.
Step 4 — Create a Snowflake user
Create a dedicated Snowflake user for ChartMogul and grant database access:
- Copy and paste the following commands into the SQL editor in the Snowflake UI, replacing
<PASSWORD>with the appropriate value:
CREATE USER CHARTMOGUL_USER
  DEFAULT_ROLE   = CHARTMOGUL
  TYPE           = SERVICE
  NETWORK_POLICY = "CHARTMOGUL_POLICY";

GRANT ROLE CHARTMOGUL TO USER CHARTMOGUL_USER;
- Select the commands and click the Run button.
Step 5 — Create a storage bucket
ChartMogul provides two options for bucket storage: AWS S3 or Google Cloud Storage.
To use AWS S3:
- Follow steps 1–3 in Configuring Amazon S3 as a destination. Note the Access key ID and Secret access key, as you’ll need these in the final step. Alternatively, click Download.csv to save this information.
- Follow the steps to add Snowflake as a destination and choose AWS S3 when configuring storage.
To use Google Cloud Storage:
- Follow steps 1–4 in Configuring Google Cloud Storage as a destination. Note the location of your account’s private key as a JSON file, as you’ll need this in the final step.
- Follow the steps for Configuring an Integration for Google Cloud Storage. When creating a custom IAM role, the Snowflake Integration only requires the Data loading only permissions.
- Copy and paste the following commands into the SQL editor in the Snowflake UI, replacing
<INTEGRATION_NAME>with the name of the integration you created in the previous step:
GRANT USAGE ON INTEGRATION <INTEGRATION_NAME> TO ROLE CHARTMOGUL;
- Follow the steps to add Snowflake as a destination and choose Google Cloud Storage when configuring storage.
Step 6 — Authenticate with key pair authentication
Snowflake is replacing password-only authentication with key pair authentication. If you previously used password-only authentication, follow the instructions in Steps 6 and 7 to reauthenticate your Snowflake account.
- Open a terminal window and run the following command to generate an encrypted private key in the PEM format. This step will generate a file
rsa_key.p8.
openssl genrsa 2048 | openssl pkcs8 -topk8 -v2 des3 -inform PEM -out rsa_key.p8
- When prompted, enter a password. You’ll need to provide the password when creating the public key later in this step and when adding Snowflake as a destination in step 7.
- To generate a public key, enter the following command referencing the
rsa_key.p8private key file. This step will generate a filersa_key.pub.
openssl rsa -in rsa_key.p8 -pubout -out rsa_key.pub
- When prompted, enter the password you provided in step 2.
- Store the private and public keys securely.
- To extract the public key, run the following command:
cat rsa_key.pub
- Extract the content between
-----BEGIN PUBLIC KEY-----and-----END PUBLIC KEY-----. - In the SQL editor in the Snowflake UI, paste the following command to assign the public key to your Snowflake user. Replace
<USER_NAME>with the Snowflake user you created in step 4 and<PUBLIC_KEY>with the output of the previous step.
ALTER USER <USER_NAME> SET RSA_PUBLIC_KEY='<PUBLIC_KEY>';
To verify the user’s public key fingerprint, paste the following command into the SQL editor in the Snowflake UI. Replace <USER_NAME> with your user name.
DESC USER <USER_NAME>;

SELECT SUBSTR(
  (SELECT "value"
   FROM TABLE(RESULT_SCAN(LAST_QUERY_ID()))
   WHERE "property" = 'RSA_PUBLIC_KEY_FP'),
  LEN('SHA256:') + 1
);
Run the following command in the terminal:
openssl rsa -pubin -in rsa_key.pub -outform DER | openssl dgst -sha256 -binary | openssl enc -base64
Compare both outputs. If they match, the public key is configured correctly.
Step 7 — Add Snowflake as a destination
- With ChartMogul, navigate to Settings & Data > Destinations.
- Click ADD DESTINATION and select Snowflake.
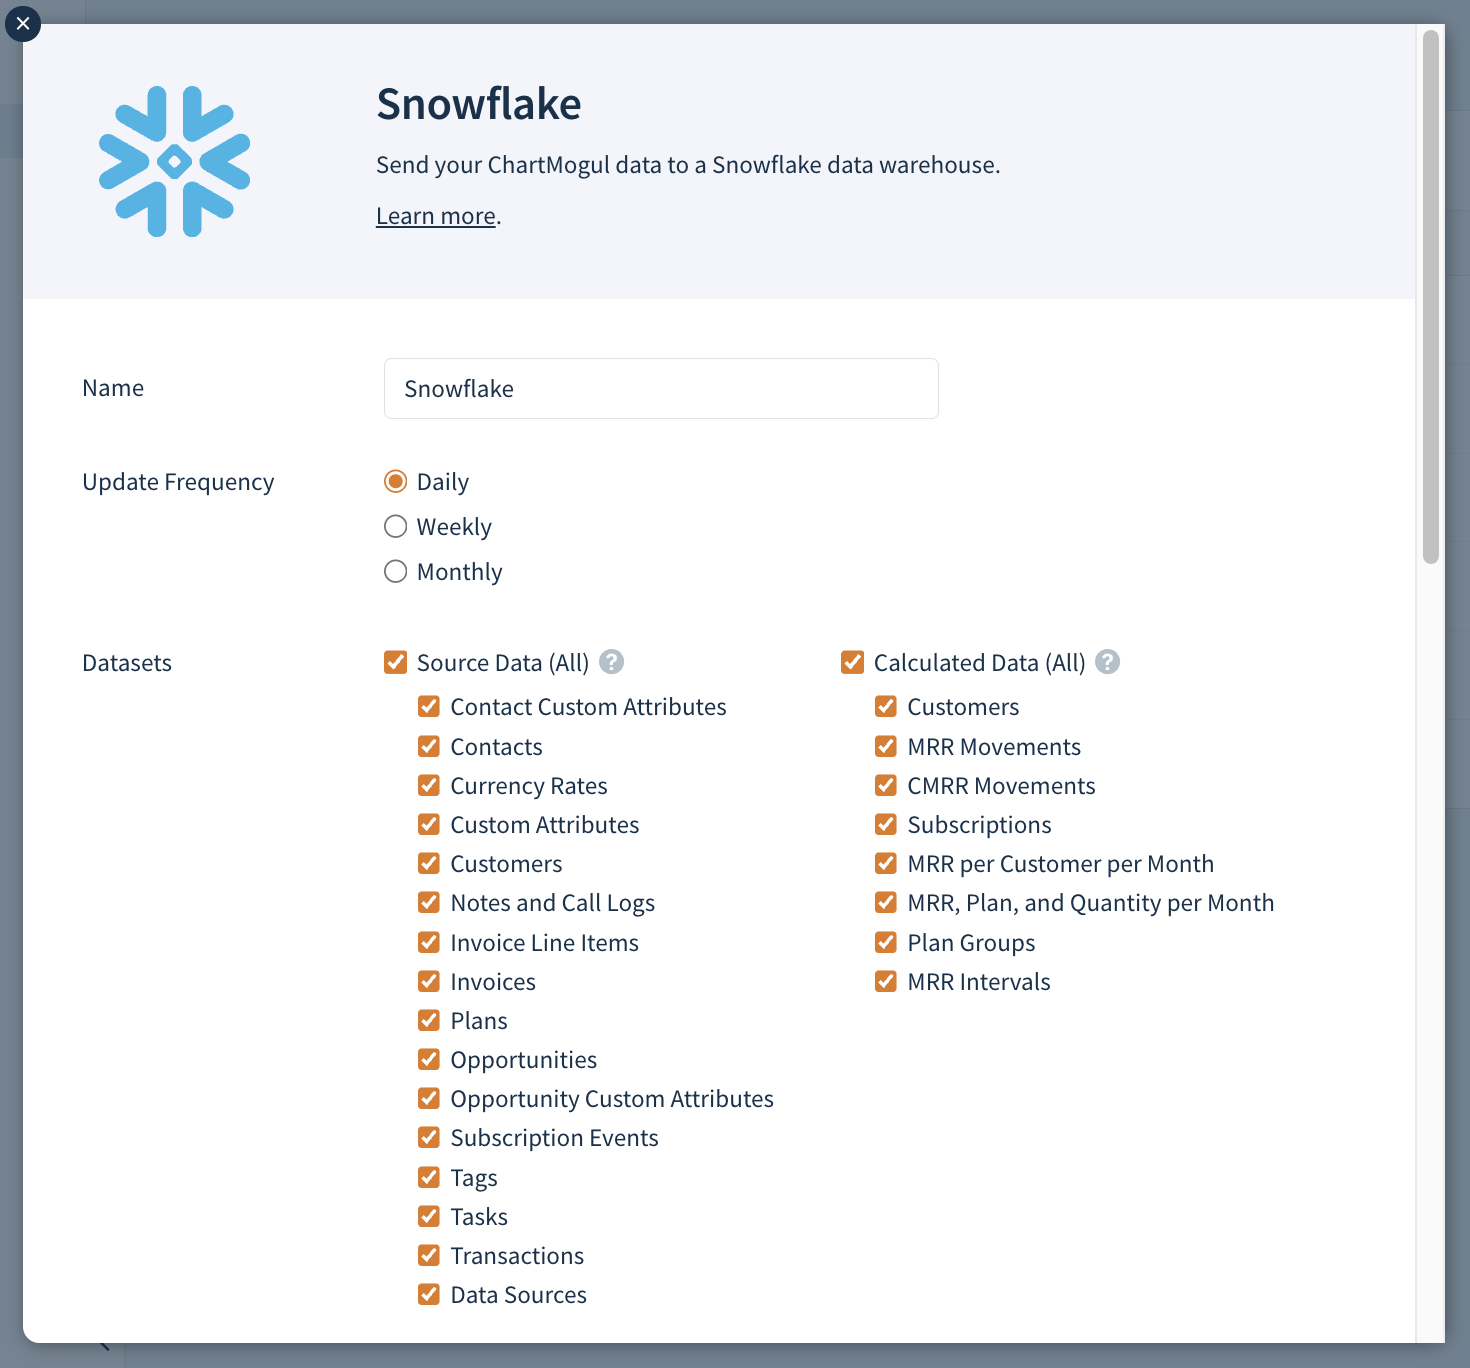
- Enter a unique name for your destination in the Name field. Then click Next.
- Under Update Frequency, choose how often you’d like ChartMogul to export data to Snowflake:
- Daily (09:00 UTC each day),
- Weekly (09:00 UTC each Sunday) or
- Monthly (09:00 UTC on the first day of each month).
- Choose which datasets you'd like ChartMogul to send:
- Within Configure Snowflake:
- Account: Snowflake account identifier.
- Warehouse: The name of the warehouse you created in Step 1.
- Username: The name of the user you created in Step 4.
- Private Key: The private key you generated in Step 6.
- Private Key Password: The password you entered when generating the private key.
- Database: The name of the database you created in Step 1.
- Role: The name of the role you created in Step 2.
- Schema Prefix (Optional): ChartMogul uses
chartmogul_dataas the schema name. Complete this field to add a prefix to the schema
- Select your storage bucket and complete the following fields:
- For AWS S3:
- Bucket Name: The name of your bucket created in Step 5.
- AWS Region: The region of your bucket selected in Step 5.
- Access Key ID: The Access key ID from Step 5.
- Secret Access Key: The Secret access key from Step 5.
- For Google Cloud Storage:
- GCS Integration Name: The integration name you created in Step 5.
- Bucket Name: The name of your bucket created in Step 5.
- JSON Key file: The private key you downloaded as a JSON file in Step 5
- For AWS S3:
- Click SAVE to create the destination. Click SEND DATA to start the first export.
ChartMogul will be sending the datasets you’ve selected to Snowflake based on your Update Frequency setting.
Click SEND DATA NOW to trigger an export outside of your scheduled intervals. Learn more.
After deleting your Snowflake destination in ChartMogul, the data that has been synced up to the point of deletion will remain in the database.